

This post may contain affiliate links, including Temu affiliate links. If you make a purchase through one of these links, I may earn a small commission at no extra cost to you.
The first time I heard about sourdough I thought that in order to succeed with it one had to be a member of an elite club of people with complex skills, knowledge, and secrets. I was intimidated.
Then I thought – well, why not? If so many people do this, probably I can too.
I started watching more YouTube videos on this topic and reading blog posts. Everybody did it differently! With different proportions of flour to water, temperature, flour types, feeding schedules. I got overwhelmed – what was the correct way?
My first batch was not successful, it just wouldn’t rise no matter how many times I fed it. Nothing resembling juicy, bubbly and overflowing starters from Pinterest pictures. So I tossed it away (later I learned I could have carried on with what I had, just tweaking a couple of things).
I started digging deeper to understand my mistakes and made a second batch. It turned out successful, and I now use it for my baking.
Sourdough is a topic where it’s so easy to get nerdy. There is science behind all the biochemical processes, and there are so many variables that determine the result.
But, even though sourdough is complex, it doesn’t have to be complicated.
I want to break down the process for you into easy, simple, no-fuss principles and steps, so that you can make your own perfect sourdough starter and bring traditional cozy baking into your home. Without complicated processes, measurements, equipment, or overthinking.
So now, let’s begin.
- What is a sourdough starter?
- Common misconceptions about making a sourdough starter
- Ingredients
- Supplies
- Things to remember when you make your sourdough starter
- Directions
- FAQs
- How to store and take care of a sourdough starter?

What is a sourdough starter?
A sourdough starter is a colony of yeast and bacteria from your environment living in a mix of water and flour that they are feeding on.
These yeast and bacteria come from the air, from your skin, from objects around you, and also from the flour that you use when you first make your starter.
When you provide them with food (flour mixed with water), they get attracted from the environment, feed on the flour, and start growing and creating their own colony.
When feeding on flour, they produce carbon dioxide that makes dough rise and creates nice bubbles. They also make grains easier for you to digest.
In older times, people couldn’t go to a supermarket to get a packet of yeast for their baking. So they used this ‘wild yeast’.
A jar of sourdough starter will be an important worker in your kitchen, bringing your baking to a whole new level, giving you and your loved ones delicious, nutritious, and healthy food.
Common misconceptions about making a sourdough starter
I see lots of misconceptions about sourdough starter over the internet. They make the process seem much more complicated than it needs to be. And making a sourdough starter is simple, once you understand the basics.
Here are the things that either don’t make sense to me or are completely unnecessary – and we can cut unnecessary things to make the process easy, quick, and sustainable.
“Mix a cup of flour with a cup of water, on the next day – discard the half.”
Totally unnecessary to use such big amounts of precious flour to make a sourdough starter.
We want to catch yeast and bacteria and provide them with a healthy environment for growth and development. And a little jar and a couple of tablespoons of flour is more than enough to accommodate plenty of these little organisms.
We want a healthy, stable, balanced, and active colony of yeast and bacteria. It’s the quality that matters, not the quantity.
Also we discard the growing starter every day, so why waste kilos of flour?
“You need a kitchen scale.”
You don’t need a scale. You don’t need fancy sourdough kits with temperature indicators from Amazon either. You don’t need any exact measurements of weight, fermentation time, or temperature. Sourdough starter is really resilient and it’s difficult to mess it up.
Unless you use chlorinated water or put the starter in a 90°C sauna, it will be just fine with whatever measurements or temperature you use.
“Avoid getting sourdough in contact with metal”.
If I’m lazy to take out my silicone spatula, I mix everything with a regular stainless steel spoon, and I haven’t yet killed my starter. Same with bowls – I now use a stainless steel bowl to mix and bulk ferment my bread dough, and it works just fine.
I don’t know where this misconception about metal killing the bacteria comes from, maybe it’s a tale from older times. But stainless steel works just fine.
“The starter is ready to use when it doubles in size”
Depending on the ratio of water to flour, flour type, and probably many other factors, different starters will rise differently. There are tons of variables in the fermentation process and how your starter turns out. It may have a 1.5x increase, 2.5x or even 3x increase in size at its peak.
Ingredients
- Whole grain flour – wheat or rye: Whole grain flour is not only good for you, but it also already contains natural yeast and bacteria that will develop your sourdough starter. Avoid plain white bleached flour.
- Water: Pure well / filtered / bottled / boiled water. Avoid chlorinated water as it might kill the bacteria that you want to cultivate. Use water free from chemicals. Or if you only have access to chlorinated tap water, boil it for a couple of minutes to let the chlorine escape, and let it cool before using for your starter.
Supplies
Essentials (these are more than enough):
- a small container of 100-200 ml for your starter, e.g. a spice jar, a small glass jar, a tea cup, a water glass;
- some kind of a stick to mix everything together: a handle of a spoon, a chopstick, or a narrow silicone spatula;
- something to cover the container with: a cheesecloth, a small kitchen towel, or a cloth napkin;
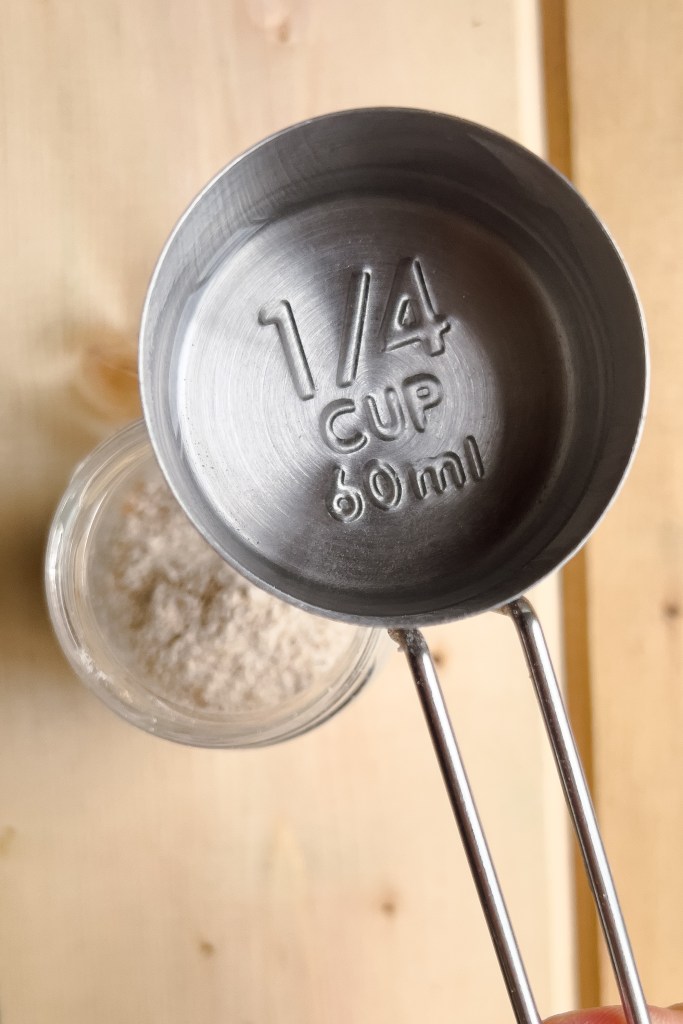
- a measurement tool: ideally a measuring cup (1/4 cup), but regular tablespoons will also work – we don’t need to be really precise here.
Nice-to-haves (in no way necessary):
- Measuring cups and spoons – to be more precise;
- Narrow silicone spatula – easy to scrape the starter down from the walls of the jar;
- Jar cover – to allow the starter to breathe while protecting it from dust;
- Rubber band – to mark the initial level and see how much your starter rises;
- Kitchen scale – for even more precision, if you want to.
Things to remember when you make your sourdough starter
Using the right flour
The food that you give to your yeast and bacteria, i.e. the flour, is a crucial component that will determine how strong your starter is.
Personally, I had absolutely no success making a starter with all-purpose flour. Here in Georgia the commonly available flour is plain white flour, called “high-grade”. I have no idea if it’s bleached or not, but what I know for sure that it’s not a good food for my sourdough yeast and bacteria.
I had to do some searching across local supermarkets to find whole wheat flour, and that’s when I was able to make an active, strong sourdough starter.
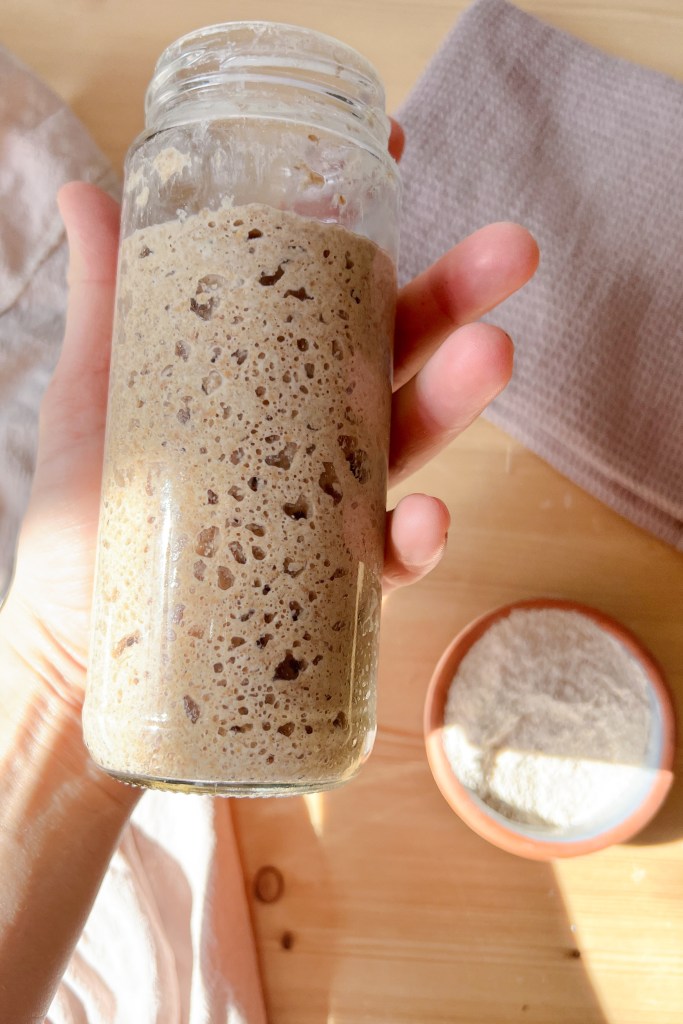
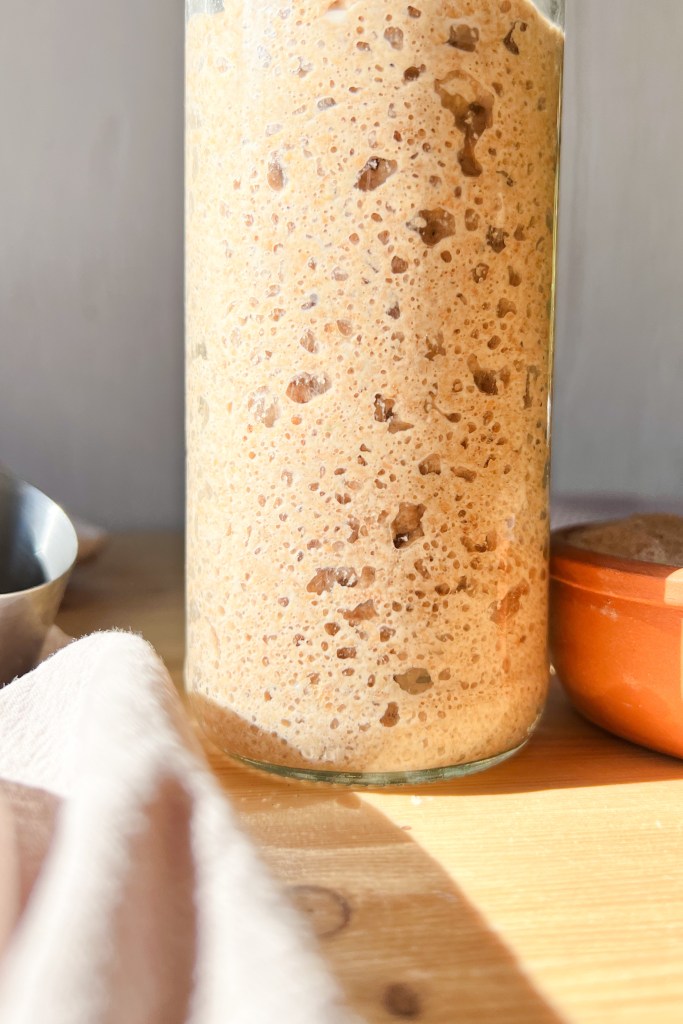
In preparation this post, I did an experiment and created two starters – one with so-called high-grade flour and another one with whole wheat flour. All the conditions (temperature, time, flour-to-water ratio) were the same for both. The only variable is the type of flour.
Check the difference on the photo:

Using measurements correctly
Some recipes might call for equal parts of water and flour – but how do you interpret this? There are at least two ways.
Here is some simple math.
1 cup (240 ml) typically contains around 120 g of flour. So if you interpret “equal parts” as by volume, you will have 120 g of flour with 240 g of water (1 part of flour to 2 parts of liquid by weight) which will result in a pancake batter like consistency. So your starter will be quite runny.
If we are talking about equal amounts by weight, then we use 1 cup of flour (120 g) to 1/2 cup of water (120 g) – 1 part of flour to 1 part of water by weight, which will result in a thicker consistency.
A starter can be made even stiffer – 2 parts of flour (120 grams, 1 cup) to 1 part of water (60 grams, 1/4 cup).
All of these starters will work, although they will have different fermentation properties, but this is a topic for another post.
This recipe calls for equal parts of flour and water by weight, and it’s a great place to start, so let’s dive in!
Directions
Day 1
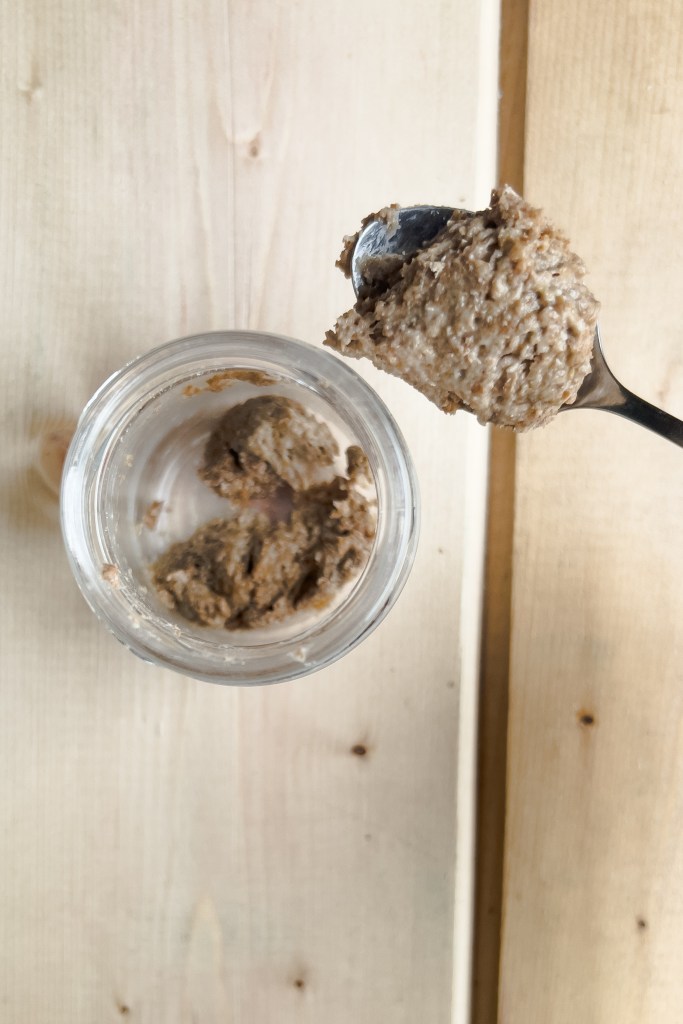
- Put 1/4 cup of whole grain flour (60 ml) into a jar.
- Add 30 ml of water (2 tablespoons or half of that 1/4 cup measuring cup).
- Mix everything together.
- Cover the jar with something breathable, e.g. a cheesecloth.
- Put the jar in a warm spot (20-24 °C)* for about 24 hours **.
* If the temperature in your house is colder, it will also work fine – you might just need a couple more days to get your starter established. No need to use any additional heaters. If your house is about 30°C, you might find the fermentation process is really fast, so you will need to do feedings twice a day instead of just once a day.
** A couple hours less or more is totally fine.
Day 2
You might already see some bubbles throughout the mixture.
- Scoop out most of the baby starter and discard, leaving only a tiny bit of it, about half a teaspoon.
- Repeat the steps from the day before:
- Add 1/4 cup flour and 2 tablespoons of water.
- Mix everything together.
- Cover the jar with something breathable, e.g. cheesecloth.
- Put the jar in a warm spot (20-24 °C) for about 24 hours.
Optional: Put a rubber band around the jar at the surface level of the baby starter to see how much it rises during fermentation.


Day 3-6 – Feeding the starter.
Repeat the process from Day 2. This is essentially what you will do each time you need to feed the starter (discard → add flour and water → mix together → leave to ferment).
You might observe the following:
- bubbles on the surface and throughout the entire starter;
- tangy and maybe slightly weird smell;
- the baby starter rises to a certain level and then gets deflated;
- while the starter rises, it forms a “hill” on the surface in the middle.
These are all good signs! But your starter is not established yet. Keep feeding it and it will gradually become mature, with a nice sourdough smell, gorgeous bubbles and amazing puff!
Day 7
Most likely you will have an active, bubbly starter with a distinct sourdough smell that has significantly (1.5x or more) risen from its initial level.
Here are the signs you want to look out for:
- numerous bubbles throughout the starter;
- significant rise (1.5x from the initial level or more);
- the starter has a “hill” in the centre;
- when you put a piece of starter into water, it floats to the surface;
- nice sourdough scent.
If it’s nice and puffy, either use it for making dough right away, or feed it again and put in the fridge.
If it doesn’t have these signs of maturity yet, it might just need a bit more time to get established. Or maybe it’s nice and active and you’re checking when it’s past its peak! In any case, feed it and check tomorrow.
You should really look for that hill in the middle. It means the yeast and bacteria are actively feeding on flour and the CO2 they are producing is inflating the starter. If the centre starts falling down and the starter is deflating, it means it’s eaten all the flour and has to be fed again.
FAQs
How long will it take to make a sourdough starter from scratch?
It usually takes about a week from the moment when you first mix flour with water to getting an active starter ready to be used in baking. It might be more, or might be less – mostly depending on the temperature.
Do I need to follow exact measurements in grams to create a sourdough starter?
No. You will never ruin your starter by adding more flour or more water than indicated in a recipe. No need to spend extra time with a kitchen scale weighing your jar, your discard, and then measuring how much flour and water you add with gram-level precision.
It only makes the process more complicated, hence less sustainable. That’s why I suggest using only a 1/4 cup measuring cup in my recipe – quick and simple.
If you don’t have a measuring cup, just eyeball it, toss water and flour in a jar and mix everything together – it will work just fine.
Do I need to invest in special tools and supplies?
No.
You just need some kind of a container, which can be a simple water glass, something to cover it with, plus something to measure flour and water with – and you don’t even need the precision of a measuring cup. Use whatever you have in your kitchen.
And remember that it’s an ancient method that has been used for millenia, and ancient people didn’t have kitchen scales or fancy sourdough kits, so it’s fine to keep it simple.
Is my starter ruined? Should I throw it away and start over?
If there is mould growing through the entire volume of the starter, if it has a pungent smell and a weird colour – then it might be ruined. Other than that, sourdough starter cultures are really resilient.
Even if you have some weird growth on the surface, you can remove it and take a tablespoon of clean starter from underneath. Check it, feed it, and most likely it will be just fine. No need to throw it away and start over again.
If your starter is not rising rapidly and you suspect a lack of activity, just keep feeding it. Try adjusting the water to flour ratio (I recommend 1:1 by weight, but surely you can deviate from this), temperature (around 24°C recommended), and make sure to use whole grain flour. If you can get freshly milled flour – it will be a special boost for the starter!
What is the brown-ish liquid on the surface of my sourdough starter?
It’s called hooch and it’s just a sign that your starter is hungry.
Pour it off, discard the majority of the starter, keeping a little bit in the jar (about a teaspoon is enough), and feed it. It should become active and beautiful again.
What is the right consistency of sourdough starter?
There is none.
It can be stiff, it can be runny, it can be somewhere in between. The difference between these starters will be not only in consistency, but also in the ratio of yeast and bacteria, hence the taste and structure of the dough.
In a liquid starter there will be more bacteria that make the flour more digestible (but also destroy the gluten network if the dough has been fermented for too long, i.e. cause overproofing). In a stiffer starter there will be more yeast with leavening activity. Both will work, but givign different results.
In this recipe I suggest using 1:1 ratio of flour to water by weight. You can establish your starter with this ratio and then experiment to get to the consistency that you prefer.
How often should I clean my sourdough starter jar? Do I need to use a clean jar with every feeding?
As you prefer! I don’t find that it affects the result in any noticeable way. And I don’t think it’s worth the effort to get a clean jar for every feeding.
However, sometimes the flour and water mix gets dry and cakes onto the jar, so it’s harder to see the content, and it looks quite messy. That’s why I like to transfer my starter into a clean jar once in a while.
Taking off the caked on flour might be tricky. It will be easier if you soak the entire jar in warm water for at least an hour before scrubbing and washing.
What temperature of water should I use for my starter?
If you want to speed up the fermentation process, use warm water.
However, don’t use water that’s more than 37°C. If you use hot water, the high temperature will kill yeast and bacteria.
If you use colder water, the starter will be fine, but take longer time to ferment.
Why do I need to discard part of my starter before feeding?
In order to provide enough food and keep your yeast and bacteria colony healthy and happy, you need to feed them with at least the same amount of flour as the starter contains.
So the more starter you have to feed, the more flour you need to add. If you had 1/2 cup of starter and you didn’t discard anything before feeding, you would have about 1 cup of starter next time. After that – 2 cups of starter, and so on. Which doesn’t make any sense. And you would need to use tons of flour for feeding.
So in order to keep the amount of starter manageable, we need to discard some of the “hungry” starter before we give fresh food to the remaining yeast and bacteria.
Do I need to discard exactly half the of starter before feeding? How do I measure it?
No. There is no need to measure how much starter you discard.
What you need to do is give your starter at least the same amount of flour as it currently contains. That is, you can discard as much starter as you want, and avoid any measurements.
Just leave a tiny bit of your starter (a teaspoon or half a teaspoon is enough) and give it fresh flour and water. The cultures from that tiny bit will multiply and occupy the entire amount of flour and water that you give them.
What should I do with the discard?
In the first week or so when you are making a new starter, it’s just getting established. You might also notice it has a weird smell. You don’t want to do any baking with it, so you can put discard from this “work-in-progress” starter into compost.
Actually that’s why I recommend getting started with minimal amounts of starter in a small jar – as discarding big amounts of starter is a waste, both of money and natural resources.
When you have an established starter, you can collect the discard in a jar, store it in the fridge, and then use it for recipes that are not sensitive to how active your starter is, e.g. sourdough quickbreads or pancakes.
I have almost zeroed out my starter, what do I do? Should I start a new one all over again?
We’re talking about yeast and bacteria that are tiny and can grow really rapidly. In order to inoculate a cup of flour and water mixture, you don’t need much starter.
Even in a quarter teaspoon of starter there are enough yeast and bacteria to inoculate a cup of flour in just one feeding.
So just use whatever tiny amount of starter you have left. Tip: when you’re dealing with small amounts of starter, first mix it with water, then add flour to this liquid mix. The starter will be equally distributed in water that is then equally mixed with flour, making inoculation easier.
How to store and take care of a sourdough starter?
It depends on how often you need an active bubbly starter ready for baking.
Many people say “keep it in the fridge and feed once a week if you bake rarely, store on the counter and feed every day or twice a day if you bake several times a week”.
To me this approach seems too rigid, and our baking schedules are usually not that straightforward.
I would say: just keep an active, recently fed starter ready to go when you need to make dough with it, and when you don’t need it – store in the fridge and feed once a week.
It’s important to know how much time you need for your starter to become active in your conditions, with your flour and water – it might be 4 hours in warm temperatures, and over 12 hours in colder temps. Knowing this, it will be easy to plan your sourdough schedule.
Remember, the lower the temperature, the slower the fermentation process. If you store your starter in the fridge, it will take more time to ferment the flour and get hungry again. If you keep it at room temperature and your house is warm, the starter will be fermenting faster and you will need to feed it frequently to keep it healthy and active.
Now let’s take a look at an example.
Let’s say from experience you know that in the current temperature your starter reaches its peak (i.e maximum rise while still having a hill in the middle) in 6 hours.
6 hours before you start with your recipe, take out the starter from the fridge and feed it with the amount of flour and water to yield the amount of starter you need. E.g. if you need 100 g of starter, take a bit of your unfed starter (let’s say 10 g or just a tablespoon) add about 50-55 grams of flour and the same amount of water. Then leave the mix at room temperature to ferment.
Use the starter that you need for the recipe, leave a little bit in the jar, give it a couple of tablespoons of flour, pour the same amount of water, and stir well.
What should you do then? Well, it depends.
- If you need the starter again in 6 hours, keep it at room temperature for faster fermentation. You might want to adjust the amount of flour and water used for the feeding to get the amount of starter you will need.
- If you need it the next day, put it in the fridge. In the morning you might pull out an active bubbly starter with a hill – meaning it’s ready to use. So no need to feed it again. If it’s deflated, feed it. If it hasn’t reached its peak yet, leave at room temperature.
- If you need to bake three days later, the starter from the fridge might be deflated or even have a hootch. Take it out 6 hours before you start with the recipe, feed it and wait until it’s active again.
- If you need your starter in three weeks, keep it in the fridge and make sure to give it a new feeding about every week. Then take out and feed 6 hours before you need it.
Note: you don’t have to feed your starter after you’ve used some of it for baking. But doing so will make sure that the starter doesn’t starve while it waits for the next feeding. Meaning it will be kept nice and active.
The more you practice, the more you will develop a feeling for sourdough, and you will create your own intuitive routine.
What flour should I feed the starter with?
I often hear people say that once your starter is established with whole grain flour, you can switch to feeding it with all-purpose flour.
For me personally, my starter loses its strength when I feed it with my all-purpose flour. It just doesn’t rise as much, and the bubbles are not that impressive.
When I feed it with whole grain flour, it rises nicely and has lots of bubbles. That’s what works for me and I’m sure any starter will thrive with nutrient-rich whole grain flour.
You can try feeding your starter with different flours and see how it goes. You might discover your preferred option (please share in the comments what in case you do!).
What if I forget to feed my starter on time?
No worries! Yeast and bacteria in a sourdough starter are much more resilient than we might think.
I’ve heard of people keeping starters unfed for months, and then reviving them with a couple of feedings.
Just feed your starter as usual and observe – it might rise really well right away. If you find that it’s not as active anymore, it might need a couple more feedings before it gets back to its proper strength.
With this post I hope to encourage you to get started with sourdough. Just apply the principles I’ve outlined, and begin experimenting, trying, and learning.
Even when things don’t go as planned, please don’t be discouraged – so-called “failures” are just an indispensable part of the journey. I’ve had plenty of them myself, and I definitely have more ahead.
Keep learning, keep baking, and with practice you will acquire the priceless skill of working with sourdough.
You will be rewarded with the satisfying scent of freshly baked bread in the morning. And fluffy pancakes. Or homemade pizza. Each time when you’re about to lift off the lid on your dutch oven to check the oven spring on the loaf, it will be something truly exciting.
Whether you making sourdough on your own or with your loved ones – you will create a priceless and memorable homemaking experience.
I wish you good luck on your sourdough journey!

Leave a comment